
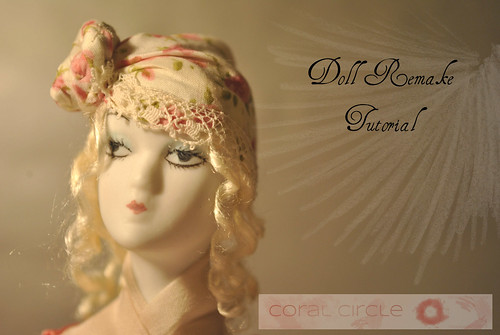
Mom gave me this doll, that she thought wasn't pretty and she was going to throw away. Knowing me, she said she thought I could use it for something. So I took on the challenge and decided to remake it to something more appealing. Sort of like in all those movies where somebody gives a person a remake and they all of a sudden become so different and attractive, when they use to be ugly... There is nothing some new clothes, and new hair style can't fix, right?
I wanted this doll to be something I imagined would be standing next to a teddy bear without one eye in a little princess's room, does that make sense? Like in old times... Maybe it was that proud porcelain face that made this image stuck in my head, but this was what I was kind of aiming for. I didn't use any reference as to how I should make her, or what she should look like, just that image in my head and more imagination.
For that reason this tutorial might not be that technical, but I will try to describe the process as well as I can in case if anybody else would like to remake a doll of theirs.
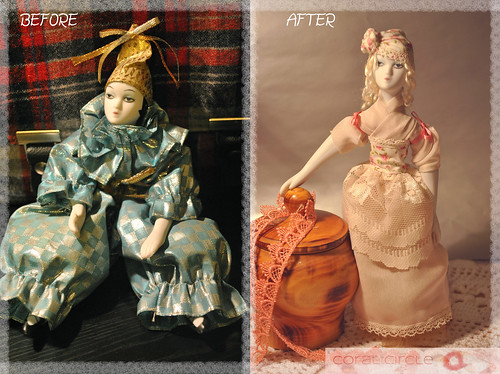
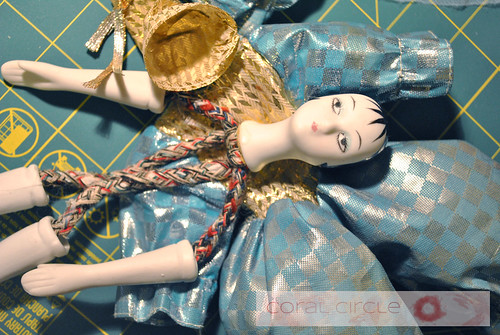
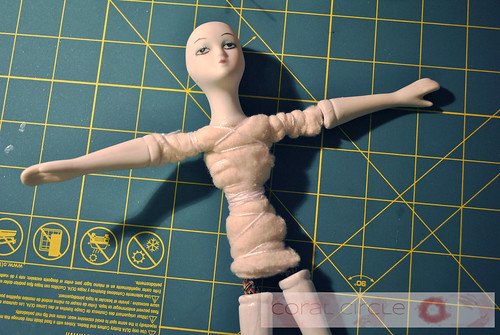
So the first thing I did was stripped that poor thing of that clown outfit. Underneath that clothes she had porcelain arms, legs, and head and everything else was wire - perfect!
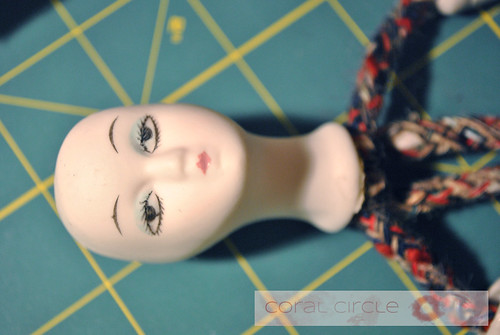
Then I erased her black hair, because I was going to make her hair more realistic. I decided to leave the face, because it gives her character.
Next I wrapped and tightened with a thick thread some quilt batting around the wires where the body was suppose to be and also around the arms to create some volume.
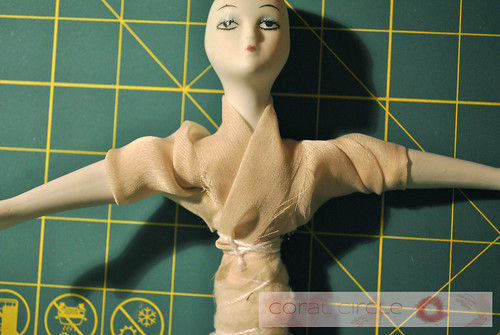
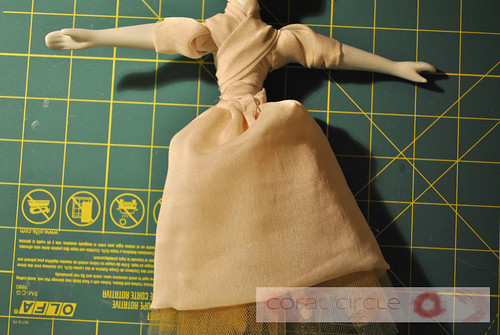
The dress was really an improvisation. If I would have to repeat it, I don't think I could. I used glue to glue the top directly to the doll.
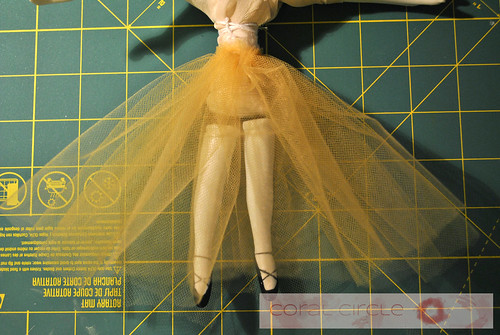
Then I sewed the under skirt and the skirt to the batting.
Then used more details and a lot of fray stopping liquid to cover up all the connections and spots where raw materials were still visible.
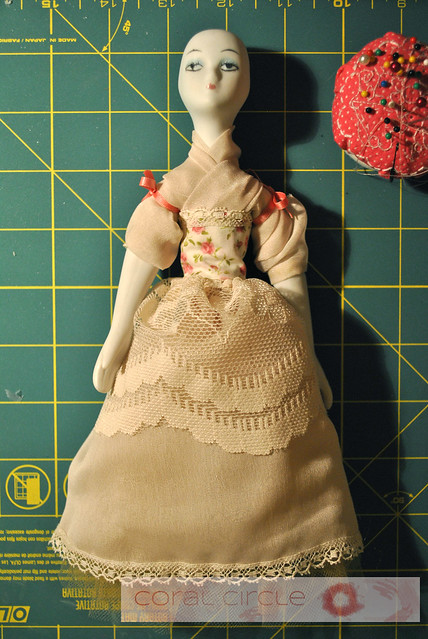
The same idea is used for the hat. I simply improvised - cut a rectangular piece of fabric, folded it, put it on doll's head, winded the remaining fabric into a rose looking knot, secured the knot with thread, then sewn some vintage lace on it to make it pretty.
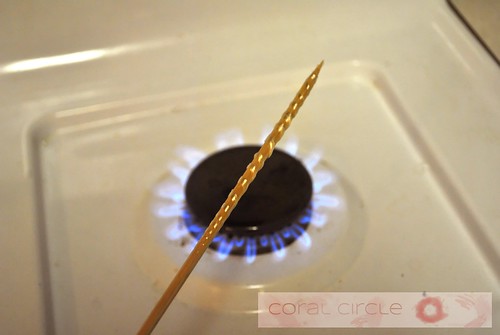
As for wigging, I used the technique that I learned when I made my own dolls. I used viscose doll hair as it is shiny and easily curled, but wool can be used as well. This is what I did.
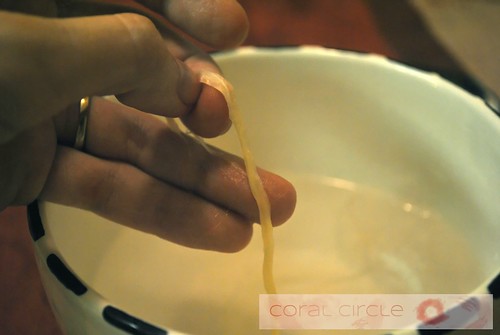
First separate the strands that you need to curl and wet them. (I used various sized and thicknesses)
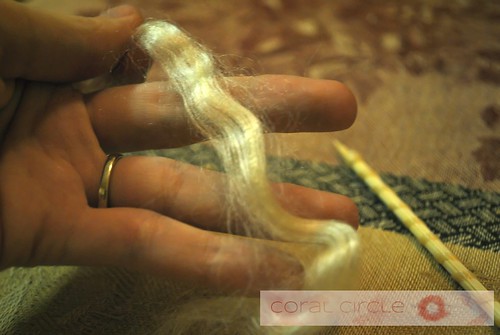
Then wind them on wooden sticks (I use kebab sticks)

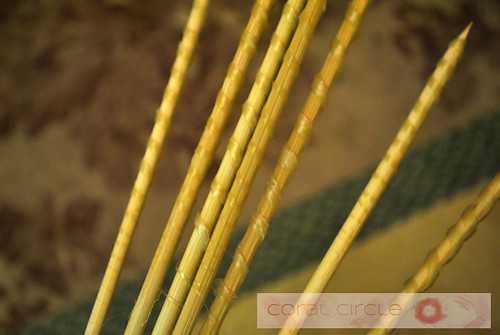
Then bake them under 150F' for about 5-10 min or until dry.
Then spin them above open flame to get rid of the little hairs that stick out.
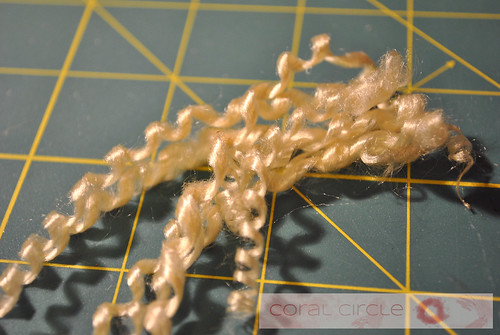
And unwind...
I glued my curls to the head , cut them...
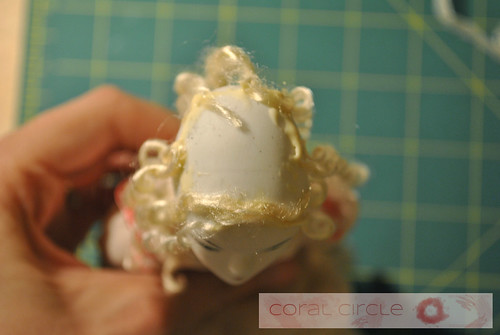
...and then glued the hat on top and voila!
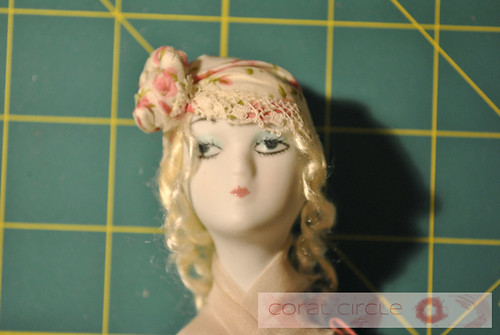
I really enjoyed this process, because I could let my imagination loose. There were no rules, I just did what I felt was right, and I am satisfied with the result.
All she needs now is a big teddy bear with one eye but that is a whole other story...
I like before and after projects making new from old. This doll looks like collectible treasure after renovation
ReplyDelete