
Besides the fact that the name itself has three letters "s" in a row in it, cross stitching is also a very fun and rewarding craft. The way I look at it, is I can't draw, but I can make art with thread, which satisfies my creative need. It is challenging at times but once you get over the details, the possibilities are endless.
The basics are really easy, and then it is up to you what you want to do with the skills...
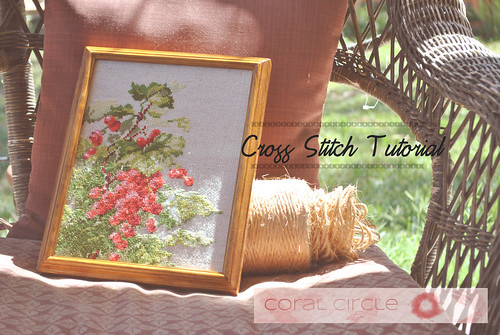
I just recently have finished two cross stitched pieces, that I made into framed pictures and today I am going to show the basics and give a couple of advices on the process.
Like any other project cross stitching starts from materials:
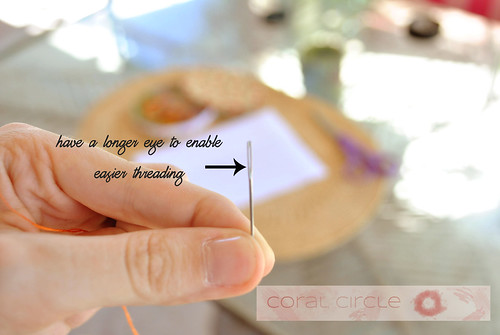
1. Embroidery needle.
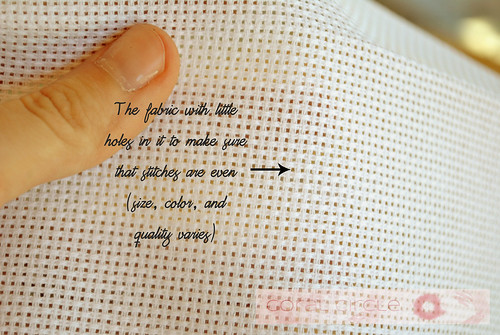
2. Cross stitching fabric (or perforated cardboard if you are doing Mill Hill which is exactly that - cross stitching on the piece of special paper instead of fabric)
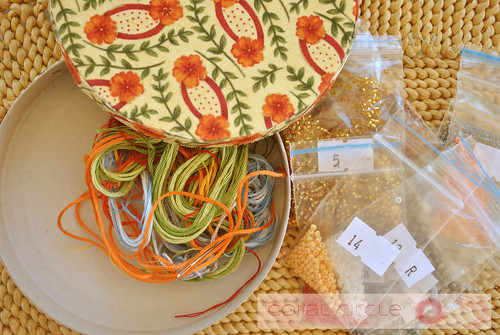
3. Embroidery thread and some times glass beads. There are patterns that offer to work only with beads, in that case you use half cross stitch to attach them and work the same way you would with a regular cross stitching project. I have a beautiful icon of Virgin Mary to make from glass beads entirely, when I am done, I will be glad to show.
4. And a pretty pattern.
**Some people like to use embroidery hoop, I use it for other types of embroidery, but not for cross stitching.
All of these materials will be neatly packed into a kit, if you choose to get one. I would recommend to do so, because it is easier for a beginner and it is so much fun to get all the goodies in one bag! But once you feel confident you can choose your own colors and materials
Now lets get to the basics of cross stitching.
Step 1: Find the middle of the pattern - there are arrows on each side of the pattern pointing at the middle, lightly crease the pattern horizontally and vertically according to the arrows, and where the crease lines meat is where the middle is on the pattern.
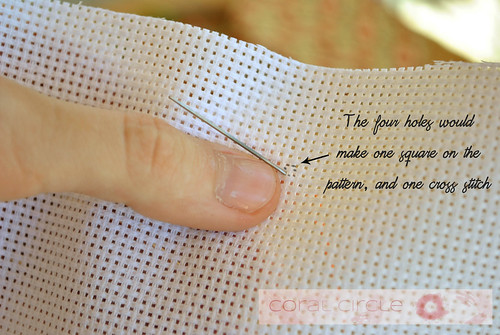
Step 2: Find the middle of the fabric - same way, crease it vertically and horizontally and where the lines cross is where the middle of the fabric is, this is where you start.
Step 3: Pick the right color of the thread according to the pattern's color key and insert the needle to make first stitch.
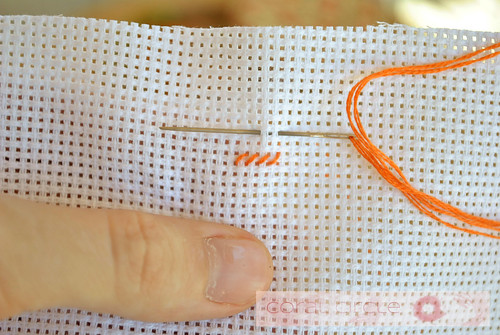
Step 4: Make a first row of half cross stitches, inserting the needle diagonally bottom left to top right.
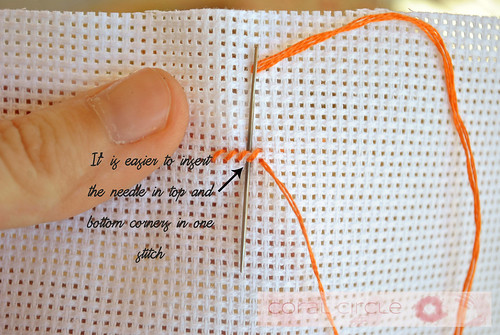
Step 5: Go back the other way and finish the cross stitches by going diagonally from bottom right to top left.
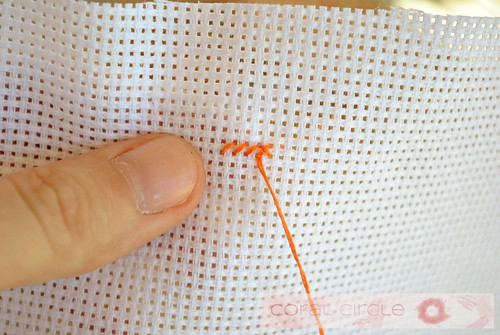
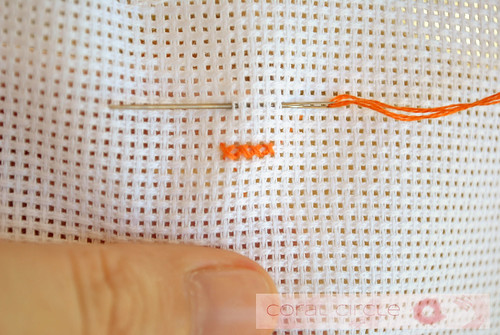
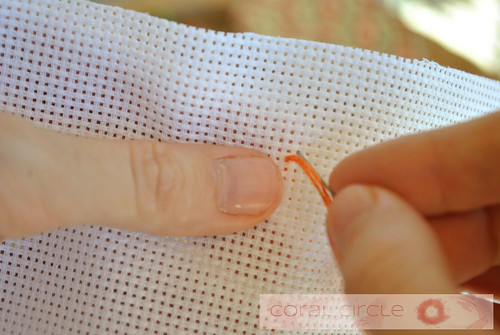
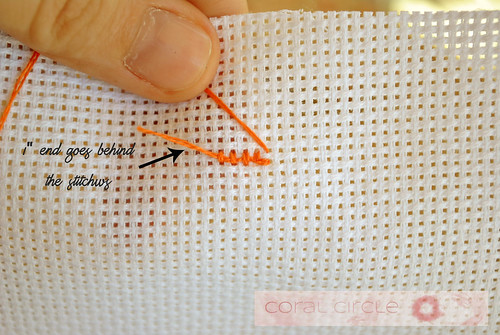
To secure the first strand, hold the 1" tail of the thread on the back of the fabric in the direction you will be stitching. Make sure the end goes behind the stitches.
Tips:
The stitching technique is easy, right? The hard part is to keep track of all the colors and reading the pattern. To me it's like doing a puzzle, I start with one color and do a little piece and then do the pieces of other color adjacent to it. It is easy to mess up if you go far out from the pieces you already made (there is also an art of saying - "good enough". I messed up in each of my pictures, can you tell?) I find that it helps to cross out with a pencil the rows that I already made.
On the back the cross stitched work looks like a Picasso painting, but you (and I) should try to make it look pretty on the back as well. If you have to jump with a thread, it's better to stop and start again where you need to, rather than making big gaps with a thread between them.

This is basically it. If you have any questions make sure to e-mail me or comment.
There are plenty of applications for cross stitched work such as towel embellishment, pictures, signs, Bible verses, and even clothes. In fact in Ukraine back in the days, people would take linen shirts and cross stitch traditional motifs on them. Until this day these shirts are considered part of Ukrainian outfit, I guess kinda like cowboy hats and boots here in US. Google it!

Next time I am going to tell you how to frame your cross stitched work!
this tutorial is so helpful! Great job!
ReplyDelete